
Your mattress is bed bug headquarters. It’s where they hide in the seams, feed while you sleep, and multiply faster than most homeowners in Koramangala or Whitefield realize until the bites show up every morning. If you’re searching for a mattress for bed bugs solution, you’ve probably already tried spraying random corners or washing your sheets, only to see the bites return within days.
Here’s the direct answer: getting rid of a bed bug treatment mattress problem for good needs three things done in order, thorough treatment of the mattress itself, a proper encasement to trap survivors and stop new ones from getting in, and follow-up checks over the next few weeks. Skip any one of these steps and the infestation comes back, usually within a month.
This guide walks you through exactly how to inspect your mattress, which treatment methods actually kill eggs and not just adults, how to choose an encasement that works, and what it takes to keep a bed bugs free mattress long term, whether you handle it yourself or bring in trained technicians.
Why bed bugs settle into your mattress
Bed bugs pick your mattress for the same reason you sleep on it every night. Warmth, carbon dioxide, and a stationary body for six to eight hours make it the easiest feeding ground in the house. Unlike mosquitoes, bed bugs don’t fly or jump, so they need you to stay still long enough for them to crawl out, feed, and retreat before sunrise. A mattress gives them that guarantee, and it also gives them dozens of tiny crevices to disappear into the moment the lights come on.
The hiding spots you’re probably missing
Most people check the mattress surface and stop there, but bed bugs rarely stay out in the open. Seams and piping along the edges are the first place they cluster, followed by button tufts, the underside where the mattress meets the box spring, and any tears in the fabric. Here’s where infestations typically start and spread:

| Hiding spot | Why bed bugs prefer it |
|---|---|
| Mattress seams and piping | Tight, dark, close to feeding surface |
| Button tufts and folds | Multiple layers to hide eggs |
| Box spring underside | Rarely inspected, wood frame cracks |
| Headboard joints | Close to pillow, easy access at night |
| Bed frame screw holes | Dark, undisturbed for months |
A single female bed bug can lay 200 to 500 eggs in her lifetime, mostly tucked into mattress seams you never look at.
Why one clean mattress isn’t enough
Here’s the part that trips up most DIY attempts: treating the mattress alone rarely solves a bed bugs mattress problem for good. Bed bugs travel between the mattress, the box spring, the headboard, and nearby furniture within a single night. If you only tackle the mattress and skip the frame or nightstand drawers, survivors simply migrate back once you’re asleep again.
Temperature and humidity in Bangalore’s apartments, especially ground-floor units and older buildings around HSR Layout or Indiranagar, tend to favor bed bug survival year-round since there’s rarely a cold snap severe enough to kill them naturally. That’s why a mattress that looks clean on inspection day can host a fresh outbreak within two to three weeks if the surrounding furniture wasn’t treated at the same time.
Understanding this behavior matters because it changes how you approach treatment. You’re not just cleaning a mattress, you’re breaking a feeding cycle that spans your entire bed setup. The next section walks through how to confirm you’re actually dealing with bed bugs, and how to isolate the mattress before that cycle continues for another night.
Step 1. Confirm the infestation and isolate the mattress
Before you spend money on treatment, confirm you’re actually dealing with bed bugs and not a dust mite reaction or a heat rash. Grab a flashlight, pull back the sheets, and inspect the mattress seams closely for live bugs, shed skins, and dark spotting. Getting this identification right saves you from wasting a week on the wrong fix.
Signs you’re looking at a real infestation
Check for these specific markers before assuming the worst:
- Live insects: reddish brown, flat, roughly the size of an apple seed
- Rust colored streaks on the mattress fabric, usually near seams
- Small black dots clustered together, which is bed bug excrement
- Pale, empty eggshells wedged into piping or folds
- Bite patterns on your skin in a line or cluster, usually on arms or legs
Finding even two of these together is enough to move forward with full treatment rather than waiting to see if it gets worse.
Isolate the mattress immediately
Once you’ve confirmed activity, stop bed bugs from spreading further while you prepare treatment. Move the mattress away from walls and other furniture if possible, since bed bugs travel along contact points. Slide the bed frame legs into bowls of soapy water or use interceptor traps, which stop bugs from climbing up and trap the ones trying to escape downward.
Isolating the mattress the same day you spot bites is the single move that keeps a small problem from becoming a room-wide one.
Strip nothing yet at this stage, just contain the spread. Skipping isolation is how a single infected mattress turns into an infested bedroom within a week, since bed bugs move fast once disturbed and will relocate to curtains, carpets, or the adjoining wall socket covers.
Step 2. Strip, wash, and vacuum everything on the bed
Strip every piece of fabric off the bed before you touch the mattress itself. Sheets, pillowcases, mattress protectors, and even the dust ruffle need to come off and go straight into a sealed plastic bag so you’re not carrying bugs across the room. Heat kills bed bugs at every life stage, and your washing machine and dryer are already equipped to do it if you set them right.
Wash everything that touched the bed
Run a hot wash cycle followed by a full dryer cycle on the highest heat setting your fabric allows. Washing alone often isn’t hot enough, but the dryer finishes the job.
- Sheets, pillowcases, and mattress protectors: hot wash, 30+ minutes on high heat dryer
- Curtains and cushion covers near the bed: same hot wash and dry cycle
- Stuffed toys or throw pillows: dryer only, 30 minutes on high heat if they can’t be washed
- Anything that can’t be washed or dried: seal in plastic for at least three weeks
If it can go in the dryer, thirty minutes on high heat is doing more work than any spray you’ll buy.
Vacuum every crevice before you treat
Once the fabric is out of the way, vacuum the bare mattress with a crevice attachment, working slowly along every seam, tuft, and fold. Push the nozzle into piping and button indents where eggs cluster, then move to the box spring, bed frame joints, and headboard screw holes. Empty the vacuum canister or bag directly into an outdoor bin afterward, since bugs and eggs can survive inside it. This step won’t finish the bed bug treatment mattress process on its own, but it strips away a large chunk of the population and clears debris that would otherwise block heat or chemical treatment from reaching hidden eggs in the next step.
Step 3. Steam or heat-treat the mattress to kill bugs and eggs
Vacuuming removes bulk numbers, but eggs glued deep in seams survive it easily. Heat above 118°F (48°C) is what actually kills bed bugs at every stage, including eggs, and that’s the real target for this step whether you’re using a steam cleaner or a professional heater. This is the point where most DIY attempts either succeed for good or fail quietly and let the infestation rebuild in a few weeks.
Steam treatment for seams and folds
Use a dry vapor steamer, not a handheld garment steamer, since you need sustained high heat and low moisture to avoid soaking the mattress. Move the nozzle slowly, about one inch per four seconds, directly over seams, piping, and tufts, letting the heat penetrate rather than just passing over the surface.
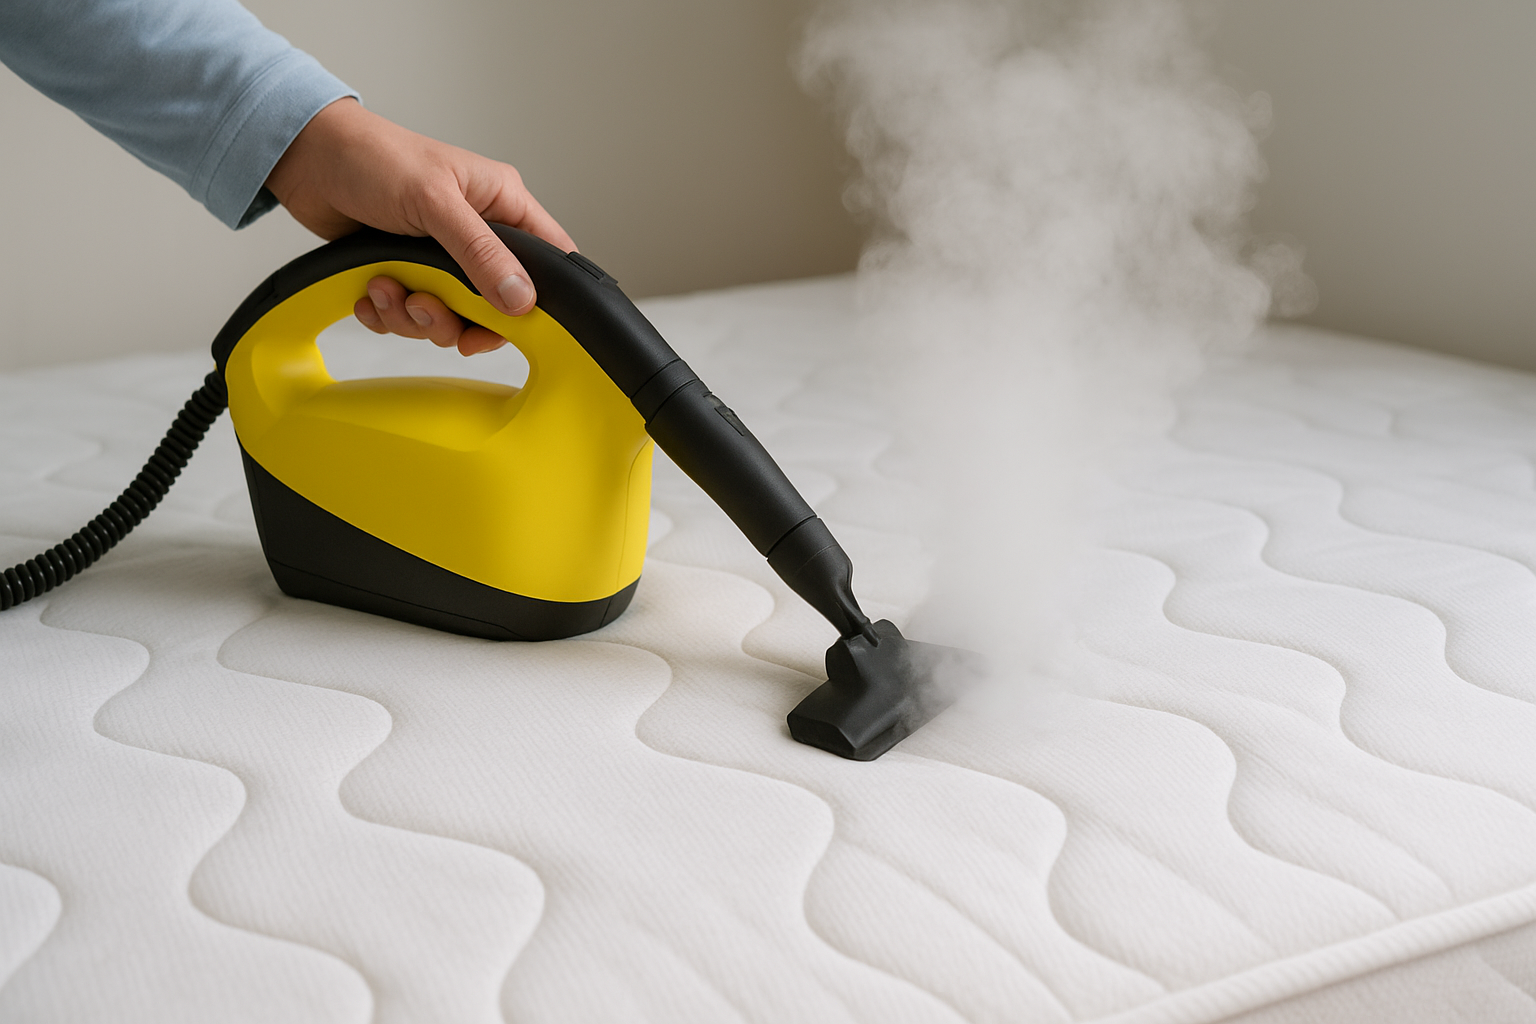
- Set steamer output to at least 160°F at the nozzle
- Work in small sections, overlapping each pass
- Let the mattress air dry fully before covering it
Rushing the steamer pass is the single reason DIY heat treatments fail, eggs need sustained contact time, not a quick pass.
Whole-mattress heat treatment
Steaming alone can miss eggs buried deep inside foam layers. Professional technicians use heat chambers or portable heaters that raise the entire mattress core to a lethal temperature and hold it there for the time bed bugs actually need to die, based on guidance from the US EPA on heat treatments. If you’re unsure your DIY steaming reached every layer, this is where a trained team earns its cost, since a mattress that looks treated but isn’t still carries live eggs.
Step 4. Encase the mattress and monitor for bed bugs
Once the mattress is dry and treated, seal it inside a certified bed bug encasement before it goes anywhere near the frame. This single move traps any survivor inside where it eventually starves, and it blocks new bugs from re-infesting the mattress from below. Skipping this step is how a treated mattress turns into a bed bugs mattress problem again within a month, since even one surviving pregnant female can restart the whole cycle.
What to look for in an encasement
Not every zippered cover on the market actually stops bed bugs. Check for these specifics before buying:
- Bite-proof, zippered fabric rated for bed bugs specifically, not just dust mites
- Zipper flap with a locking pull tab so the zipper can’t work loose overnight
- Reinforced seams with no gaps larger than 0.5mm
- Waterproof but breathable material so it doesn’t trap heat or sweat
A cheap mattress protector without a locking zip is not an encasement, it’s an open invitation.
Keep watching for four to six weeks
Encasing the mattress doesn’t mean the job is done. Check the encasement zipper and the surrounding bed frame weekly for the first month, looking for the same rust spotting and shed skins you found at the start. Place interceptor traps under each bed leg and check them every few days, since a rising trap count means the treatment missed a hiding spot elsewhere in the room. Repeat a light steam pass on the box spring and frame joints around the two-week mark as insurance, particularly if you’re in a shared building where bugs could migrate back in from a neighboring unit. Staying alert through this window is what actually separates a temporary fix from a bed bugs free mattress that stays that way.
Getting your sleep back on track
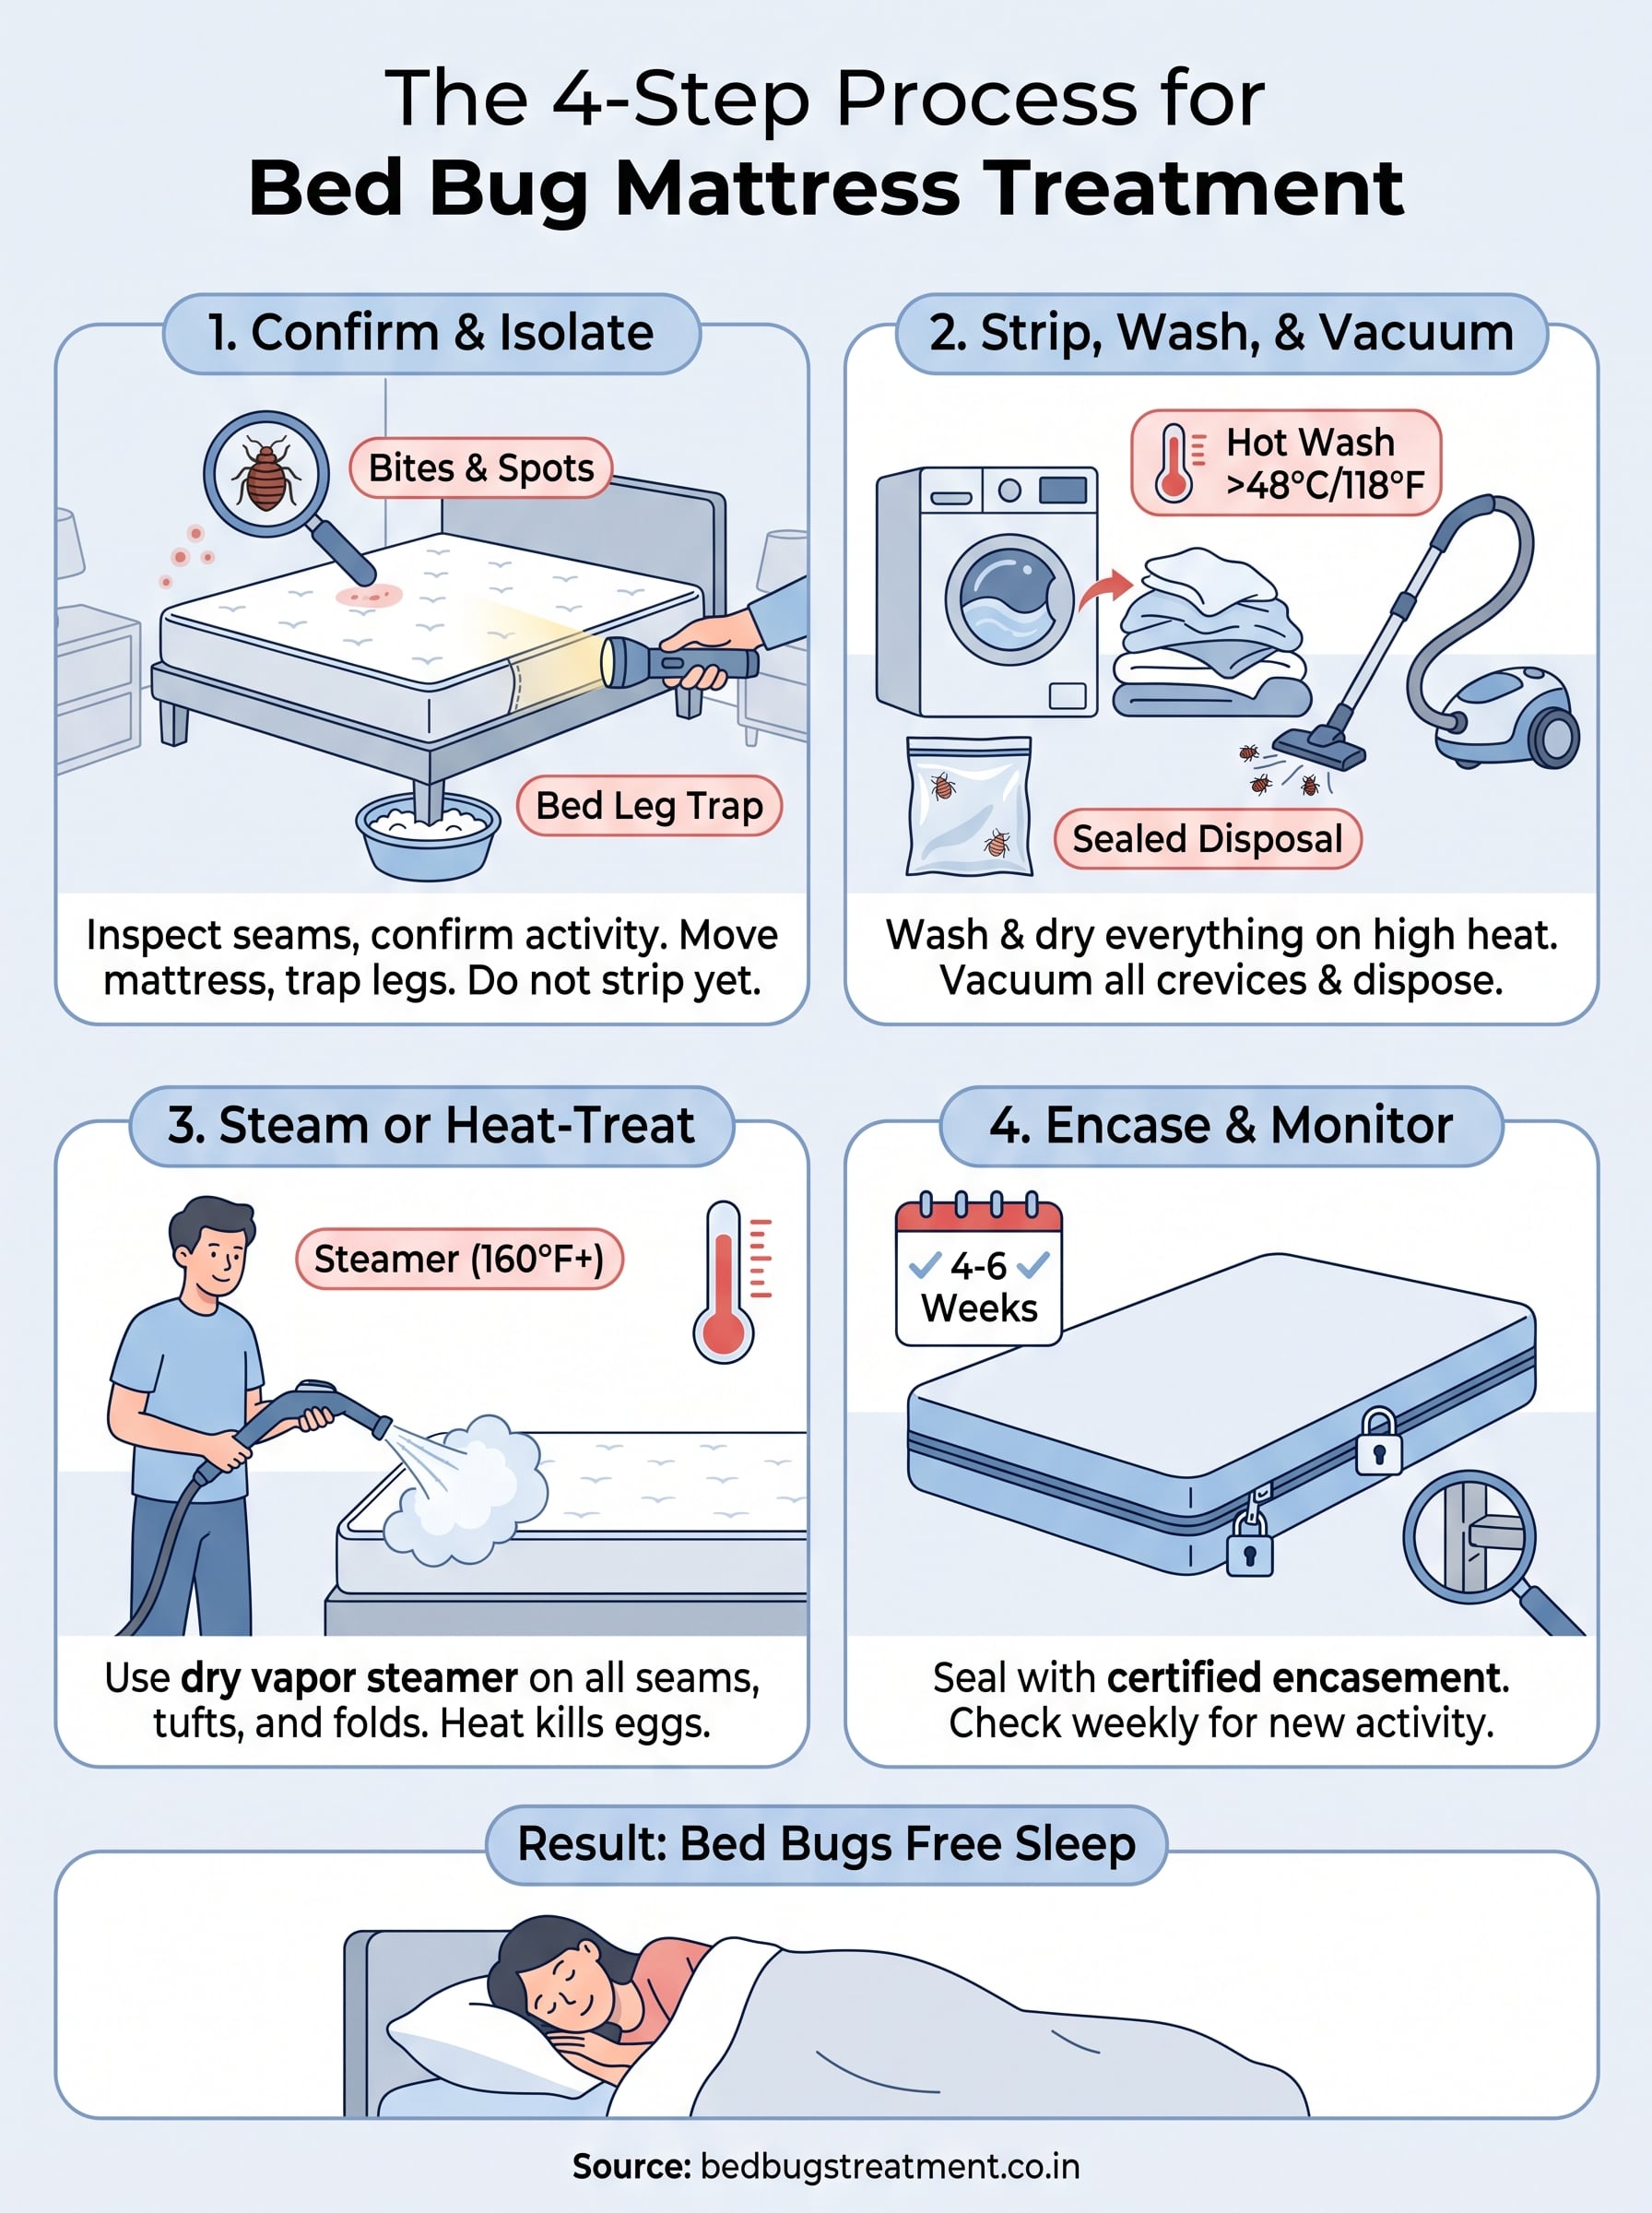
A mattress free of bed bugs isn’t luck, it’s the result of following the sequence in order: confirm, strip, heat-treat, encase, and monitor. Skip a step and the cycle restarts, usually within a month, because a handful of surviving eggs is all it takes. Do all four properly and you break that cycle for good, giving your bedroom back the one thing bed bugs took from you: undisturbed sleep.
If you’ve gone through steaming and encasement and still see rust spotting or fresh bites, that’s a sign eggs survived deep in the box spring or frame joints where DIY tools can’t reach. That’s exactly when a trained inspection pays for itself, since a technician can confirm in one visit what weeks of guessing can’t. If you’re in Bangalore and want that certainty without the trial and error, book a free bed bug inspection in Bangalore and get your mattress, and your sleep, back on track this week.