
Waking up with itchy red bites in a neat line down your arm is a bad way to start the day. Once bed bugs move into your mattress, they hide in seams, box springs, and headboard joints, and they multiply fast. If you’re searching for bed treatment for bed bugs, you’ve probably already washed your sheets and vacuumed the mattress, only to see new bites a week later.
This guide gives you a real answer: which DIY bed bug treatment steps actually kill bed bugs on your bed and mattress, and when you need a professional chemical treatment instead. Bed bugs survive ordinary cleaning because eggs resist most sprays and hide in cracks a vacuum can’t reach. You need a method that gets to eggs and nymphs, not just the adults you can see.
Below, we walk through mattress encasements, steam treatment, safe insecticide use around children and pets, and how professional technicians treat a bed from inspection to follow-up. We’ve based this bed treatment for bed bugs guide on the same multi-step process our own trained technicians use across Bangalore, Mumbai, and Pune, so you’ll know exactly what works and what’s a waste of money before you spend another sleepless night.
What to check before treating your bed for bed bugs
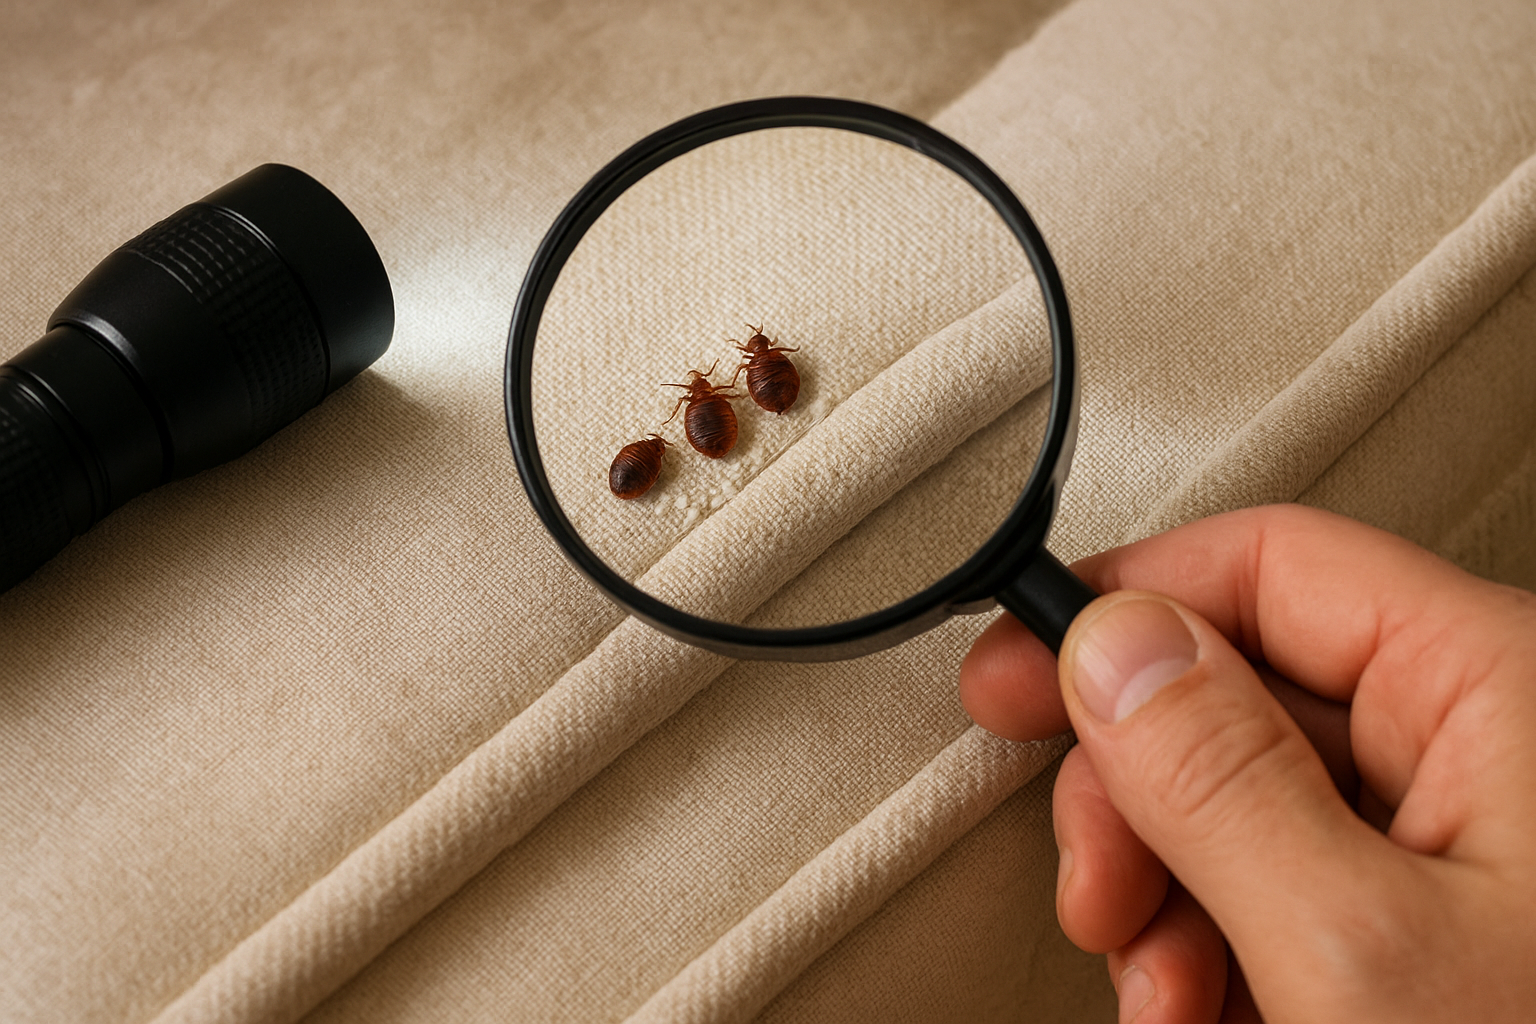
Before you tear apart your bedroom, spend fifteen minutes confirming what you’re actually dealing with. Treating for bed bugs when you have carpet beetles or fleas wastes time, money, and sleep, and it lets the real infestation grow while you chase the wrong pest. Bed bugs are flat, oval, reddish-brown insects about the size of an apple seed, and their eggs are tiny, pearly-white, and glued into seams rather than scattered loosely like flea dirt.
Confirm it’s actually bed bugs
Grab a flashlight and a magnifying glass if you have one, and check the usual hiding spots: mattress seams, the piping along the edge, box spring corners, and the joints of your headboard or bed frame. Look for three things: live insects, dark reddish-brown fecal spots that look like ink dots, and tiny white eggs stuck in clusters. A sweetish, musty smell in the room is another clue, since large infestations give off a distinct odor from their scent glands.
| Sign | Bed bugs | Fleas | Carpet beetles |
|---|---|---|---|
| Body shape | Flat, oval | Narrow, jumps | Oval, fuzzy larvae |
| Bite pattern | Straight lines or clusters | Random, mostly ankles | No bites, skin irritation only |
| Location found | Mattress seams, headboard | Carpets, pet bedding | Closets, natural fibers |
| Eggs | White, glued in seams | Loose, fall off pets | Laid in lint or fabric |
Assess how far the infestation has spread
Once you’re sure it’s bed bugs, figure out whether they’re confined to the bed or have already spread to furniture, curtains, and wall outlets nearby. Pull the mattress away from the wall and check behind picture frames, inside nightstand drawers, and along carpet edges within a few feet of the bed. This step matters because it tells you whether a DIY bed treatment alone will work or whether you’re looking at a room-wide infestation that needs a professional inspection.
If bed bugs have spread beyond the bed frame, treating only the mattress will not solve the problem.
We run free inspections in Bangalore, Mumbai, and Pune specifically because homeowners underestimate how far an infestation has traveled, and an accurate map of the problem changes the entire treatment plan.
Gather your supplies before you start
Having everything on hand before you begin keeps you from spreading bugs to other rooms while hunting for a missing tool. Set aside:
- A stiff-bristled brush to dislodge eggs from seams
- A vacuum with a hose attachment and disposable bag
- Sealed plastic bags for laundry transport
- A steamer capable of sustained heat above 120°F
- A mattress and box spring encasement rated for bed bugs
- Rubbing alcohol or a labeled bed bug spray, if you plan to use one
- Disposable gloves and old clothes you can wash immediately after
Skipping this prep is one of the most common reasons DIY treatment fails, since half-finished jobs let a few survivors rebuild the colony within weeks. The Environmental Protection Agency notes that integrated approaches combining sanitation, mechanical removal, and, when needed, professional pesticide application work far better than any single method alone, which is exactly the order we’ll follow in the steps below for treating your bed and mattress.
Step 1. Declutter and prep the bedroom
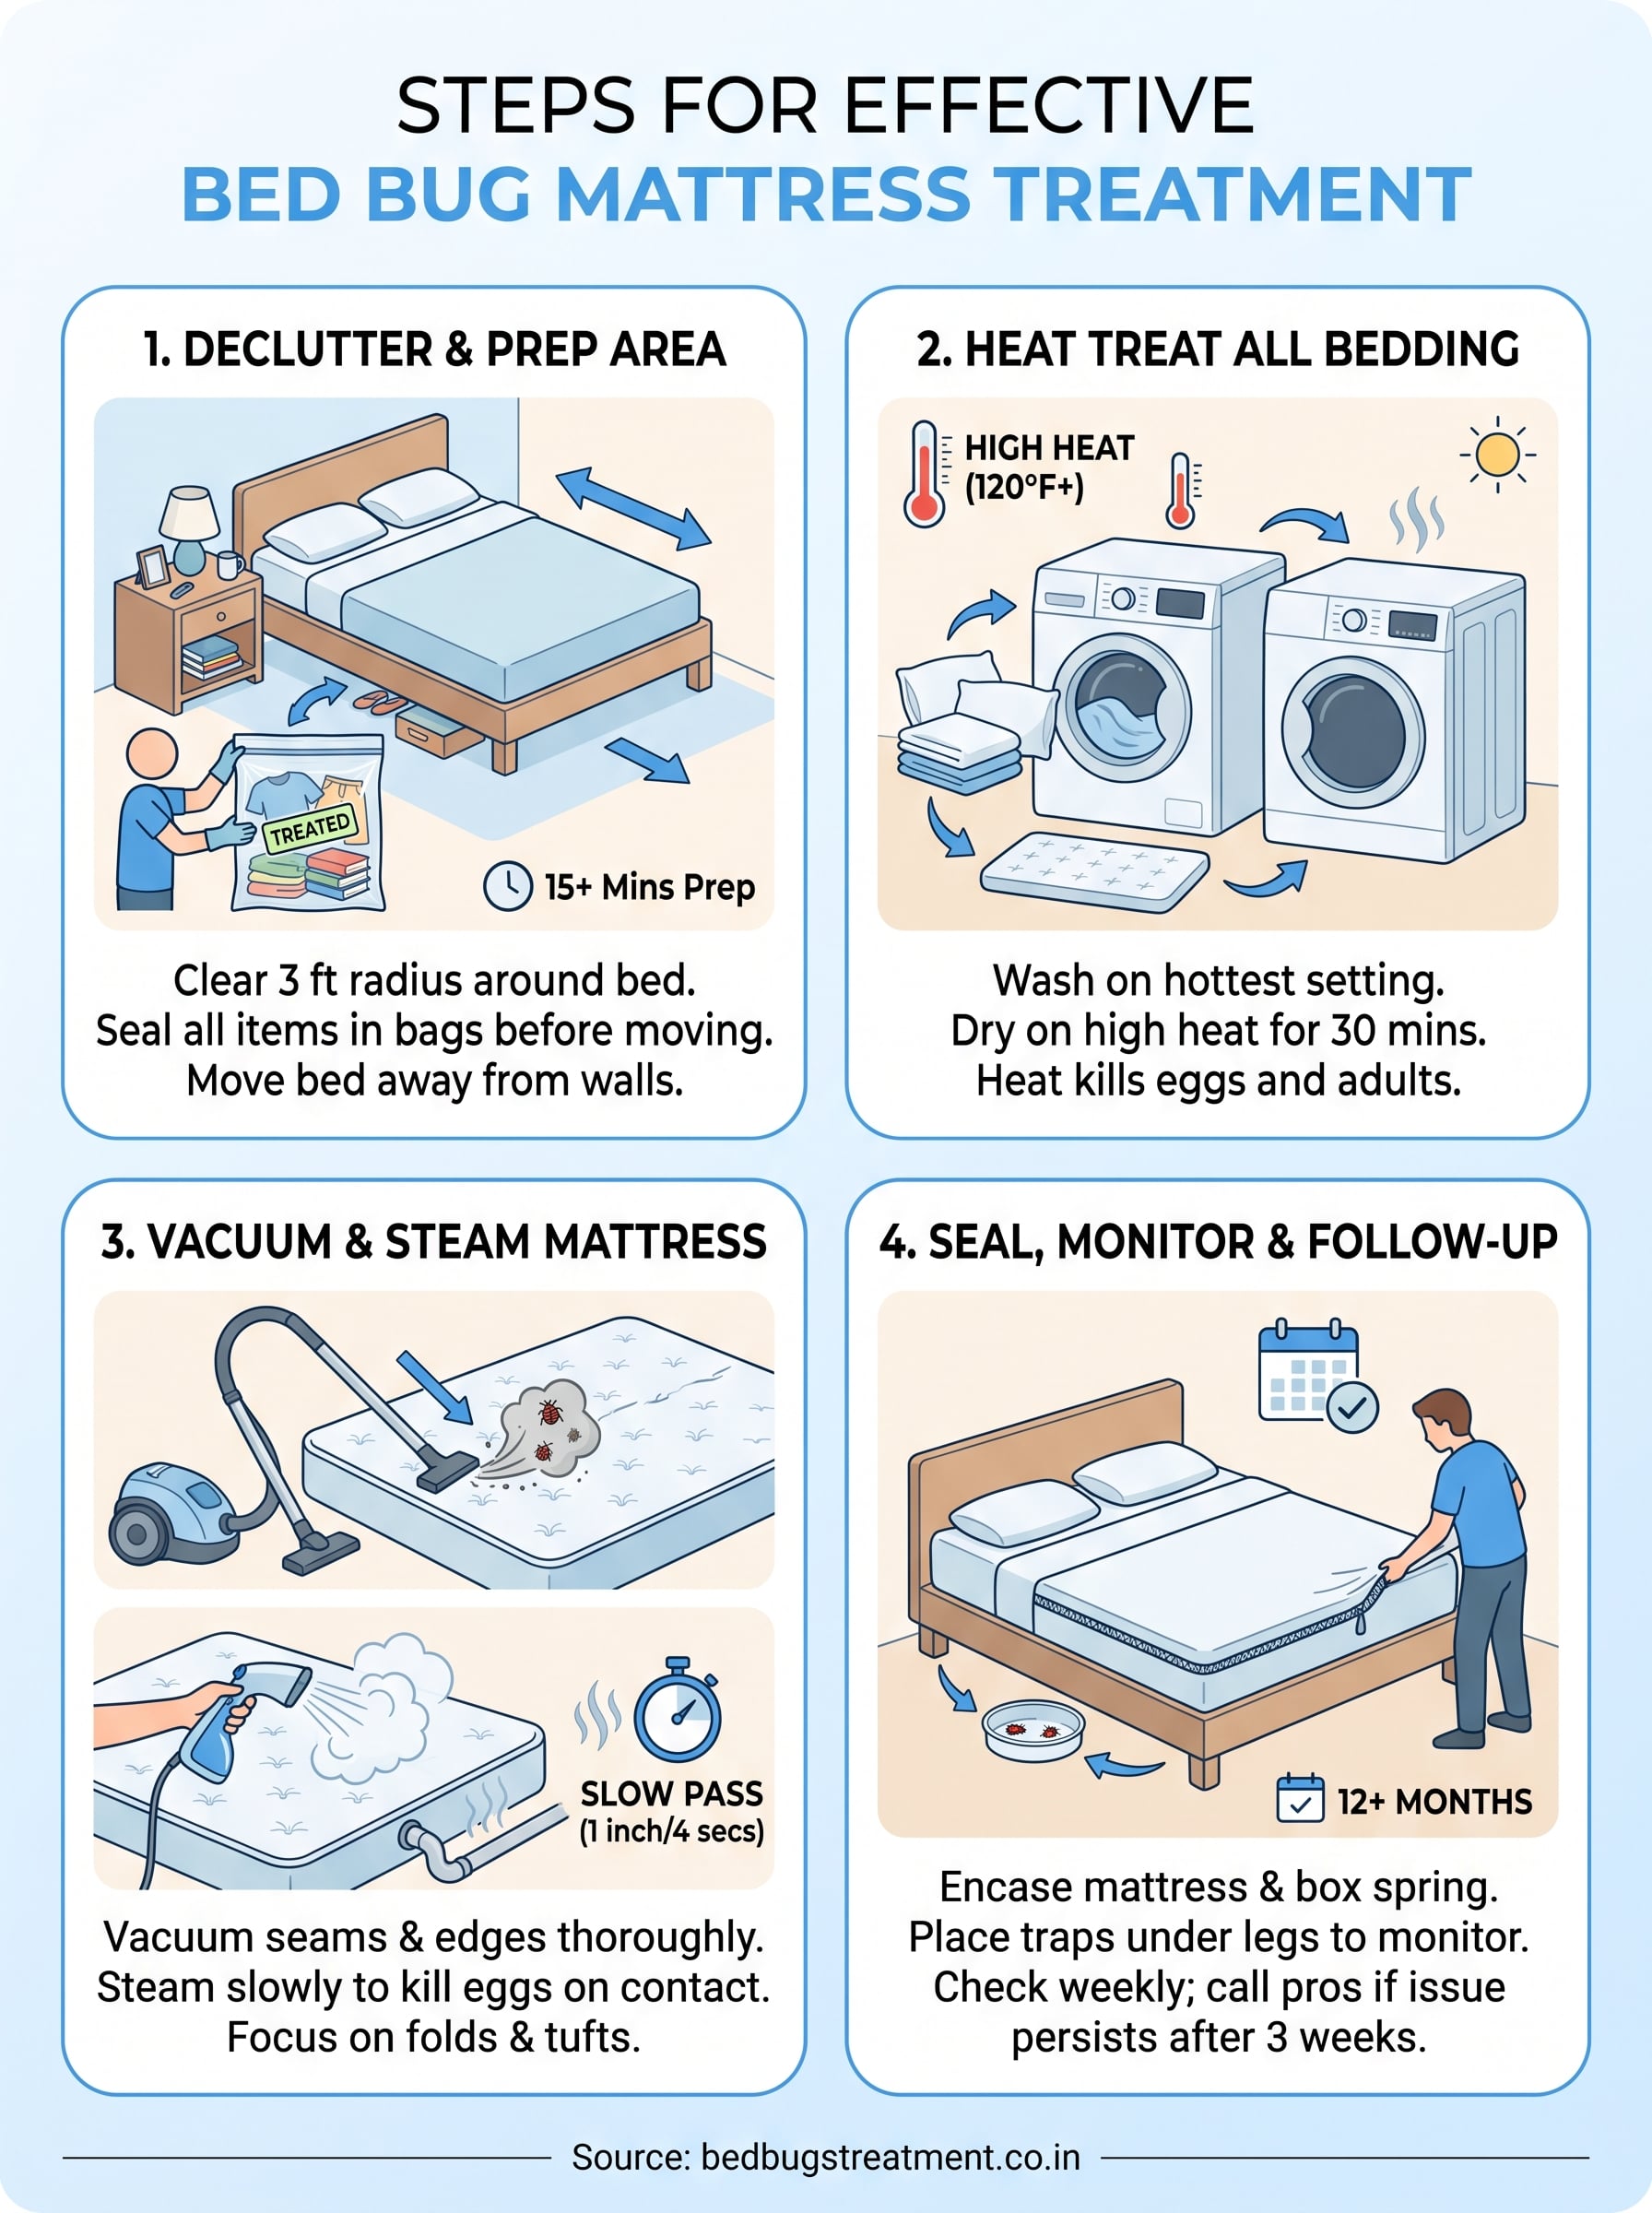
Start by clearing everything within three feet of the bed, since bed bugs travel along the nearest vertical surface once you disturb their hiding spots. Move nightstands, lamps, and any loose clutter away from the bed frame so you can see every joint and crack clearly. This is the point where most people rush, but a rushed bed treatment for bed bugs almost always misses a pocket of eggs tucked behind a headboard or under a rug edge, and those survivors restart the infestation within two weeks.
Clear the immediate area
Pull the bed at least six inches from the wall and remove anything stored underneath it, including boxes, shoes, or seasonal storage. Check the underside of the box spring and the legs of the bed frame, since bed bugs often nest where wood meets fabric. If you have a headboard bolted to the wall, unscrew it if you can, because the gap behind it is one of the most common hiding spots technicians find during inspections.
A single missed hiding spot near the bed can undo an otherwise perfect treatment.
Bag and isolate everything you remove
Every item you take off or out of the bed area needs to go straight into a sealed plastic bag until you’ve confirmed it’s clean. Don’t pile clothes or linens on the floor or carry them loosely through the house, since that’s how infestations spread from the bedroom to the living room or a second bedroom.
- Seal all bedding, curtains, and clothing from the room in plastic bags before moving them
- Label bags "treated" or "untreated" so you don’t mix them up mid-process
- Set aside anything you can’t wash or heat-treat, like books or electronics, for separate inspection
- Wipe down nightstands, lamps, and picture frames with a damp cloth before returning them to the room
Once the room is stripped down to the bed frame, mattress, and box spring, you’ve got a clear workspace and a much better chance of catching every bug in the steps that follow. Skipping this prep is why so many DIY attempts fail even when the mattress itself gets treated correctly.
Step 2. Wash and heat-treat all bedding
Heat kills every stage of a bed bug’s life cycle, including eggs, which is why washing and drying on high settings is one of the few DIY steps in any bed treatment for bed bugs that actually works when done right. Bed bugs and their eggs die within 20 minutes at temperatures above 120°F, so the goal is sustained heat, not a quick rinse. Bag every sheet, pillowcase, blanket, and mattress pad from the bed area separately from other laundry so you don’t cross-contaminate clean loads.
Wash everything on the hottest safe setting
Run bedding through the washing machine on the highest water temperature the fabric allows, then move it straight to the dryer without letting it sit. A cool, damp pile of laundry left on the floor gives any surviving eggs a chance to hatch before you finish the job. For delicate items that can’t handle hot water, skip the wash cycle and go directly to a 30-minute dry cycle on high heat instead, since dryer heat alone is enough to kill bed bugs at every life stage.
Dryer heat kills bed bugs and their eggs faster and more reliably than washing alone.
Handle items that can’t go in a washer or dryer
Pillows, comforters, and stuffed toys often carry care labels that rule out machine washing, but you still need a heat-treatment method for them. A handheld steamer or a sealed black plastic bag left in direct sun for several hours on a hot day can raise internal temperatures enough to kill bugs and eggs, though this works only reliably above 95°F ambient temperature.
- Wash sheets, pillowcases, and mattress pads on hot water, then dry on high heat for 30 minutes
- Dry-only delicate fabrics on high heat for 30 minutes without a wash cycle
- Steam pillows, comforters, and stuffed items you can’t wash
- Bag anything you can’t treat immediately and store it sealed until you can
- Return only treated items to the bedroom, never mix treated and untreated linens
Once every textile in the room has been through heat, you’ve removed one of the biggest hiding grounds bed bugs use to survive a partial cleanup, and you’re ready to move on to the mattress itself.
Step 3. Vacuum, steam, and inspect the mattress
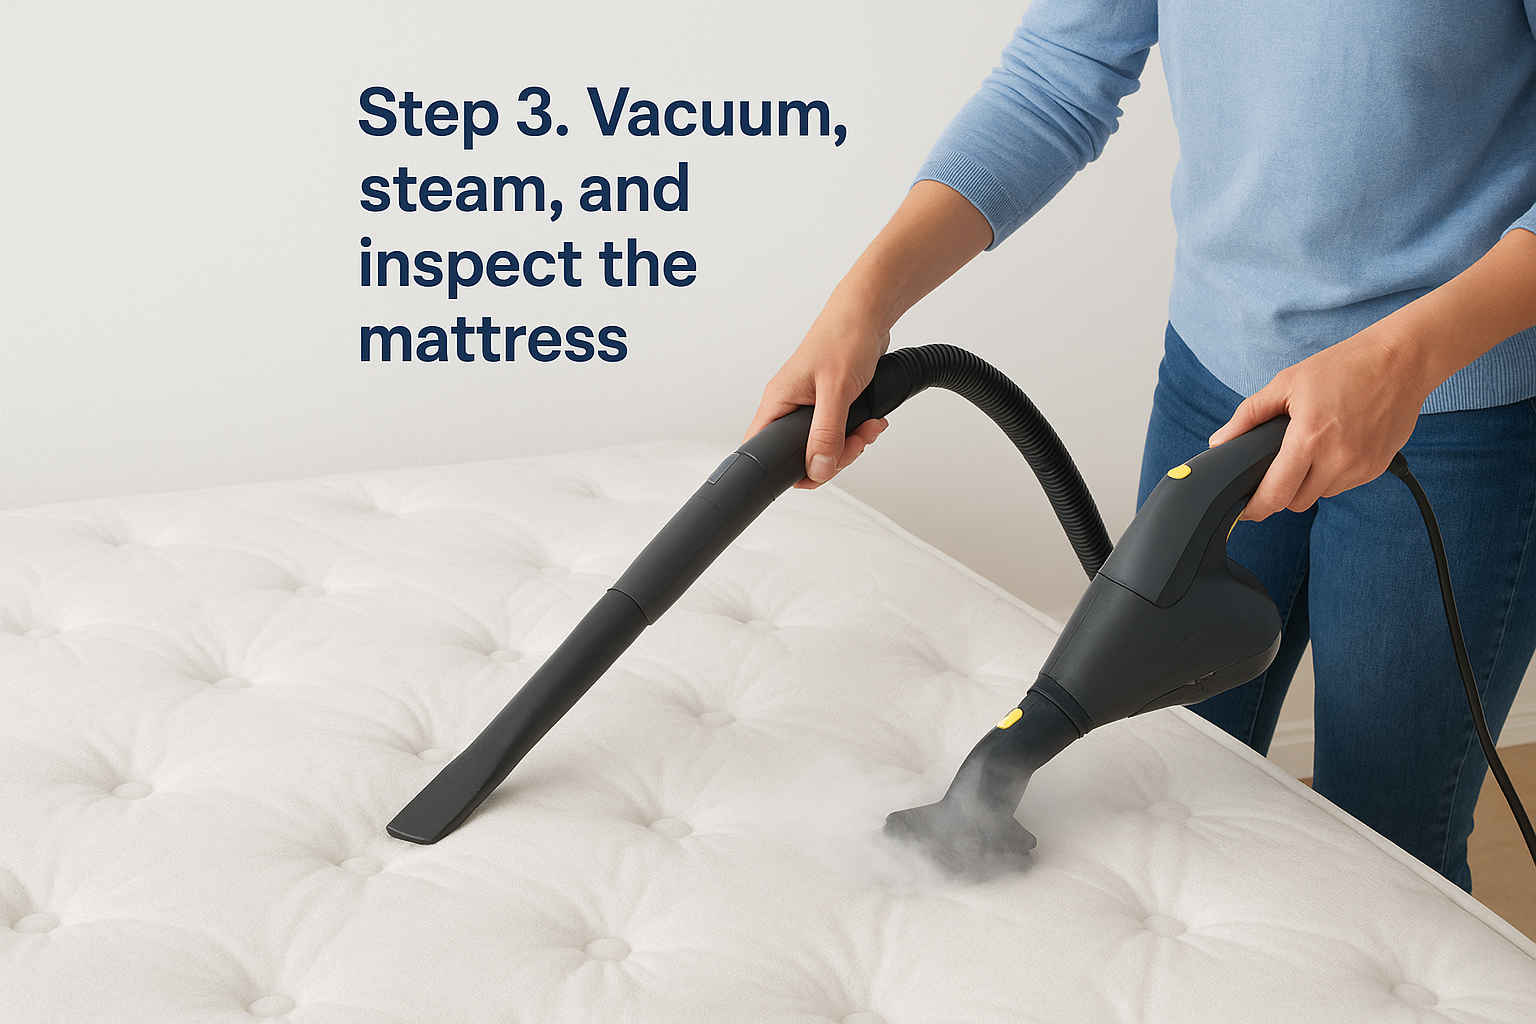
Once the room is stripped down and the linens are heat-treated, the mattress itself needs its own dedicated pass. This is where most DIY jobs go wrong, because a quick vacuum over the surface misses the seams, piping, and tufts where bed bugs actually live. Vacuuming and steaming together cover what heat from a dryer can’t reach directly, and combining them gives you the best shot at killing bugs and eggs hiding deep in the mattress fabric during a thorough bed treatment for bed bugs.
Vacuum every seam, tuft, and edge
Attach the crevice tool to your vacuum and work slowly along every seam, button, and fold on both sides of the mattress, then flip it and repeat. Go over the box spring the same way, paying close attention to the corners where the fabric staples to the wood frame. Empty the vacuum bag into a sealed plastic bag immediately afterward and throw it in an outdoor bin, since bugs trapped inside can crawl back out if you leave the bag sitting in the house.
Steam the mattress surface and seams
A steamer reaches into fabric weave and stitching that a vacuum nozzle can’t fully clean, and it kills eggs on contact when the heat holds steady. Move the steamer head slowly, about one inch per four seconds, along every seam and tuft so the surface stays hot long enough to work.
Speed is the enemy of steam treatment; a fast pass leaves eggs alive underneath.
- Set the steamer to at least 130°F output at the nozzle
- Work in small sections, overlapping each pass slightly
- Focus on seams, piping, tufted buttons, and the mattress edge binding
- Let the mattress air-dry fully before putting on any encasement
- Repeat on the box spring using the same slow, overlapping technique
Do a final inspection before covering the mattress
After steaming, check the mattress one more time under strong light for any live bugs, shed skins, or eggs you missed on the first pass. Finding even one or two survivors at this stage isn’t a failure, since it means you caught them before they multiplied again. Confirming a clean mattress now, before you seal it in an encasement, saves you from trapping live bugs inside where they can survive for months.
Step 4. Seal, monitor, and call a professional if needed
Once the mattress and box spring are clean and dry, sealing them in a certified bed bug encasement locks in any survivors and locks out new ones, completing the mattress treatment for bed bugs. Choose an encasement specifically rated for bed bugs, with a zipper that closes fully and a fabric weave tight enough to stop nymphs from crawling through. This single step turns your mattress into a trap rather than a hiding spot, since anything left inside eventually dies without a blood meal.
Encase and reassemble the bed
Slide the mattress encasement on carefully, working corner to corner so the fabric doesn’t bunch or tear at the seams. Do the same for the box spring, then set both back on the frame and push the bed away from the wall and any furniture. Leave the encasements on for at least twelve months, since that’s long enough to starve out anything that survived the earlier steps.
Set up monitoring so you catch a rebound early
Interceptor traps under each bed leg are the cheapest, most reliable way to know if bed bugs are still active after treatment. Check them weekly for the first month, then monthly after that.
- Place a pitfall-style interceptor under every bed leg, not just one or two
- Check traps weekly for four weeks, then monthly for six months
- Look for live bugs, shed skins, or fecal spots in the trap
- Keep the bed frame from touching the wall or curtains, since either gives bugs a bridge past the traps
An empty interceptor trap for six straight weeks is the clearest sign your DIY treatment worked.
When to stop DIY and call in a professional
If traps show activity after two full treatment cycles, or if bites continue past three weeks, DIY treatment has failed and the infestation has likely spread beyond the bed. At that point, a trained technician can run a full chemical treatment across the whole room, not just the mattress, and back it with a proper warranty. Our treatment is odorless, and you only need to keep the room shut for 30 minutes afterward, so you’re not stuck airing out the house or sleeping elsewhere for days. We offer free inspections and a 12-month service warranty precisely because catching a stalled DIY job early saves you weeks of repeated bites and wasted product.
Frequently asked questions
How long does it take to treat a bed for bed bugs?
A full DIY bed treatment for bed bugs, prep, washing, steaming, vacuuming, and encasing the mattress, usually takes a full day for one bedroom. After that, you’re monitoring interceptor traps weekly for a month, then monthly, for up to six months to confirm the infestation is gone.
How long do I need to leave the mattress encasement on?
At least twelve months. Bed bugs can survive a long time without feeding, so the encasement needs to stay sealed long enough to starve out anything trapped inside.
Can I just wash my sheets instead of doing the full process?
No. Washing kills bugs and eggs on the bedding itself, but it does nothing for what’s hiding in the mattress seams, box spring, or headboard joints. Skipping the vacuuming, steaming, and encasement steps leaves enough survivors to rebuild the colony within weeks.
How do I know if my DIY treatment worked?
Check your interceptor traps under each bed leg weekly for the first month. An empty trap for six straight weeks, with no new bites, is the clearest sign the treatment held.
When should I stop DIY and call a professional?
If traps still show activity after two full treatment cycles, or bites continue past three weeks, the infestation has likely spread beyond the bed and needs a professional chemical treatment. Ours is odorless and only requires the room to stay shut for 30 minutes afterward.
We offer free inspections and a 12-month warranty across Bangalore, Mumbai, and Pune.
What temperature actually kills bed bugs and their eggs?
Sustained heat above 120°F kills bed bugs and their eggs within about 20 minutes, which is why washing and drying bedding on high settings works as a DIY step. A steamer needs to hold at least 130°F at the nozzle to have the same effect on a mattress surface.
Do I need to throw away my mattress?
No, in most cases. A mattress that’s been vacuumed, steamed, and sealed in a certified bed bug encasement for twelve months doesn’t need replacing, since the encasement traps and starves out anything left inside. Replacement is really only worth considering if the mattress is already damaged or the infestation keeps returning despite proper treatment.
What if bed bugs have spread beyond my bedroom?
If you find signs in furniture, curtains, or outlets outside the immediate bed area, a mattress-only treatment won’t solve the problem. That’s a room-wide, or house-wide, infestation, and it’s the point where a professional inspection makes more sense than continuing DIY.
Keeping your bed bed bug-free
A successful bed treatment for bed bugs comes down to attacking every life stage at once: heat for the linens, steam and vacuuming for the mattress, encasements to trap survivors, and traps to catch a rebound early. Skip any one of these steps and you’re gambling on a colony that only needs a few survivors to rebuild within weeks. Treat the whole bed, not just the parts you can see, and check your traps like you mean it.
Honestly, a stubborn infestation rarely stays confined to a mattress for long, and DIY methods have limits once bugs spread into walls, furniture, or a neighboring unit. If your traps keep showing activity after two treatment cycles, don’t keep burning weekends on it. Book a free bed bug inspection with our trained technicians in Bangalore, Mumbai, or Pune, and get a proper warranty backing the job instead of guessing your way through another sleepless month.